Securing your Wi-Fi network means configuring your router and devices so that only trusted people and hardware can connect, data is encrypted in transit, and risky defaults are removed. In plain terms: you reduce the chance of neighbors, malware, or drive-by attackers sneaking onto your network or snooping on your traffic. This tutorial is practical and vendor-agnostic; menu names vary by brand, but the principles stay the same. Disclaimer: this is general security guidance; if you run a business, handle sensitive data, or must meet regulatory obligations, consult a qualified professional for a tailored setup.
At a glance, here’s the path you’ll follow:
- Turn on WPA3 (or WPA2-AES if needed), and disable legacy protocols.
- Use strong passphrases and an admin password; turn off WPS.
- Enable automatic firmware updates.
- Rename your SSID smartly (don’t hide it for “security”).
- Segment with a guest network and an IoT-only network.
- Lock down services: disable UPnP and remote admin; use HTTPS.
- Improve DNS privacy and filtering (DoH/DoT).
- Track and control devices; know what’s on your Wi-Fi.
- Monitor and alert on changes and new joins.
- Tune radio and channel settings to limit leakage and interference.
- Use a VPN for remote access; avoid open ports.
- Keep a maintenance rhythm: backups, reviews, and safe device lifecycle.
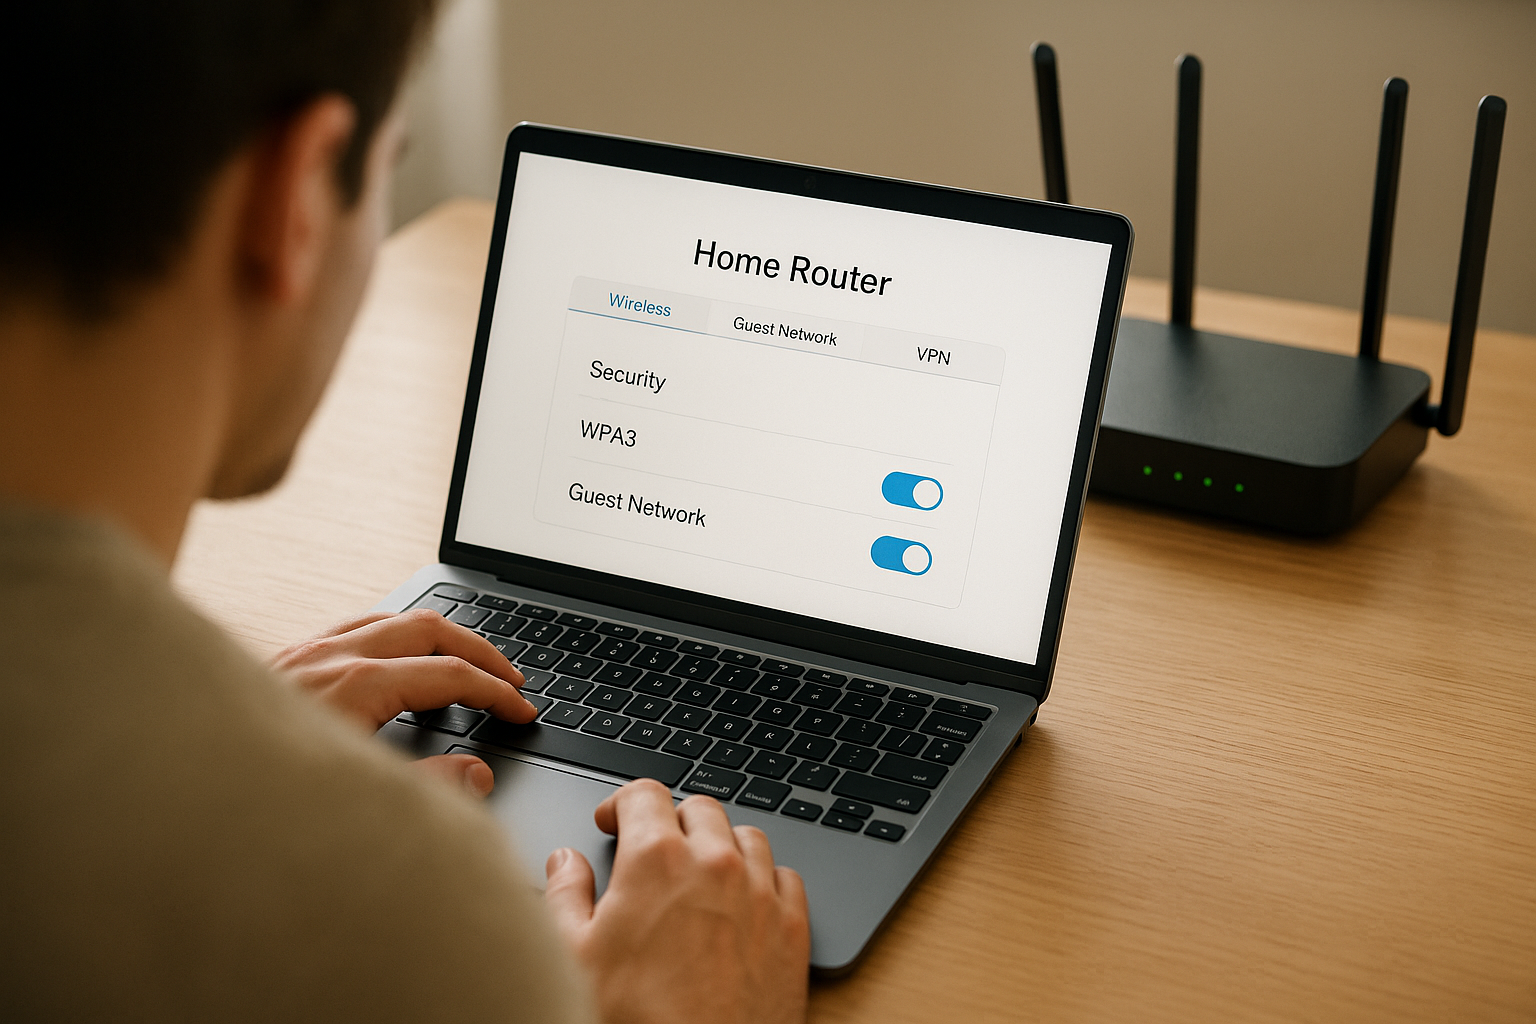
1. Use WPA3 Encryption and Disable Legacy Protocols
Start by enforcing modern encryption. On most routers, set the Security Mode to WPA3-Personal (sometimes labeled WPA3-SAE). If some older devices can’t join, use WPA2/WPA3 Transition temporarily, but plan to phase out the stragglers and move to pure WPA3. Always choose AES/CCMP—never TKIP or mixed TKIP/AES. If your only option is WPA2, ensure it’s WPA2-Personal (AES); avoid WPA or WEP in all circumstances because they’re trivially broken. Require Protected Management Frames (PMF) as “required” if the UI allows it; this helps prevent certain de-auth attacks. These settings make offline password guessing and packet sniffing dramatically harder for an attacker and set a secure foundation for everything else you do.
Why it matters
WPA3 improves on WPA2 by replacing the older handshake with SAE (Simultaneous Authentication of Equals), which resists offline dictionary attacks and protects even when passwords are so-so. Combining WPA3 with AES/CCMP and PMF provides a solid baseline aligned with mainstream guidance from security agencies and vendors.
Numbers & guardrails
- Best: WPA3-Personal + AES/CCMP + PMF=Required.
- Acceptable: WPA2-Personal (AES) only if WPA3 isn’t available.
- Blocklist: WEP, WPA, TKIP, “open” home networks.
Synthesis: Locking your Wi-Fi to WPA3 (or WPA2-AES if necessary) turns strong encryption on by default and eliminates the easiest paths attackers use on home networks.
2. Create Strong Passwords and Disable WPS
Your Wi-Fi passphrase and the router’s admin password are your front doors. Use long, unique values—length beats clever character tricks. A memorable passphrase like four to six unrelated words is easier to type on phones but still highly resistant to guessing, especially when WPA3 prevents offline cracking. Equally important: set a separate, long admin password for the router’s login; never reuse it anywhere else. Finally, turn off WPS (Wi-Fi Protected Setup). The PIN method is prone to brute-force attacks, and even push-button WPS increases your attack surface for little benefit.
Mini table: passphrase strength (rough orders of magnitude)
| Passphrase length & type | Typical character set | Offline crack time at 10¹¹ guesses/s* |
|---|---|---|
| 12 lower/upper digits | ~62 chars | many centuries |
| 16 word-based (4–5 words) | letters+spaces | far beyond practical |
| 20 random | ~62 chars | far beyond practical |
*Heuristic scale for intuition, not a guarantee; WPA3’s SAE sharply limits offline guessing.
How to do it
- Set Wi-Fi passphrase to 16–24 characters or a 4–6 word phrase.
- Set admin password to 20–32 characters (use a password manager).
- Disable WPS (PIN and push-button).
- Store both in your password manager and share with family via secure channels (QR code, manager sharing).
Common mistakes
- Using your phone number, street name, or pet’s name.
- Reusing your email password for the router.
- Leaving WPS enabled “just in case.”
Synthesis: Long, unique secrets plus WPS disabled remove the most common shortcut attackers exploit—guessing or bypassing your password.
3. Turn On Automatic Firmware Updates
Router firmware updates patch exploitable bugs, add security features, and improve stability. Many modern routers and mesh systems offer auto-update; turn it on and let the device patch itself during off-hours. If yours lacks auto-update, schedule a monthly check—log in, click Update, and apply available fixes. Some updates also remove risky features by default (for example, vendors have removed or limited WPS due to security concerns). Don’t forget downstream gear like range extenders and access points; keep everything on the latest stable release available from the manufacturer.
Numbers & guardrails
- Auto-updates: enabled where available.
- Manual check cadence: at least monthly; immediately if you hear of a critical flaw.
- Reboot window: schedule late night to avoid disruptions.
Mini checklist
- Check router, mesh nodes, extenders for updates.
- Back up configuration before major upgrades.
- Re-review security settings after big version jumps.
Synthesis: Keeping the firmware fresh quietly shuts many doors an attacker could use—without you having to remember every detail each time. ncsc.gov.uk
4. Rename Your SSID Smartly (Don’t Hide It)
Your SSID is your network’s public name. Rename the factory default to something neutral that doesn’t reveal your identity, address, or router model. Resist the urge to hide the SSID; hiding doesn’t provide real security, and it can make devices behave less predictably as they broadcast probes trying to reconnect. If your router and devices support it, require Protected Management Frames and keep the SSID visible so roaming and device sleep behaviors remain stable. If you run both 2.4 GHz and 5 GHz (and 6 GHz, if available), you can use one SSID for all (“Smart Connect”) or separate SSIDs; separate names sometimes help with tricky IoT devices. The goal is clarity without leaking personal or technical breadcrumbs.
How to do it
- Change SSID to a non-identifying phrase (e.g., “orchard-net”).
- Avoid model numbers and surnames.
- Leave SSID broadcast on; rely on encryption, not obscurity.
- If needed, separate IoT on its own SSID (see Step 5).
Common mistakes
- Hiding SSID thinking it’s “stealth mode.”
- Using the same SSID as a neighbor, causing roaming confusion.
- Embedding apartment numbers or full names.
Synthesis: A clean, neutral SSID improves usability and avoids leaks; real protection comes from strong encryption and segmentation, not from hiding the network name.
5. Segment with a Guest Network and an IoT-Only Network
Segmentation prevents one compromised device from endangering everything else. Create a guest network for visitors and low-trust devices; enable client isolation so guests can reach the internet but not each other or your main LAN. Create a separate IoT SSID for smart plugs, cameras, and appliances; if your router supports VLANs or “profiles,” place IoT in its own VLAN with limited access and tighter DNS filtering. This reduces lateral movement—malware on a cheap camera can’t poke your laptop or NAS. Many routers let you rate-limit guest/IoT SSIDs so they don’t hog bandwidth.
How to do it
- SSID #1: Main (WPA3, full LAN access).
- SSID #2: Guest (isolation on, no LAN access).
- SSID #3: IoT (isolation on, optional DNS filtering).
- Optional: apply bandwidth caps (e.g., 10–25 Mbps) to Guest/IoT.
Numbers & guardrails
- Isolation: On for Guest and IoT.
- Access rules: IoT → Internet only, block LAN; allow only what’s needed (e.g., your phone to view camera feed via vendor cloud or a specific NVR).
- Band selection: put IoT on 2.4 GHz if range matters, keep Main on 5/6 GHz.
Synthesis: Separating guest and IoT traffic confines risk to smaller boxes; if one box “catches fire,” it doesn’t spread to the rest of your network.
6. Harden Services: Disable UPnP and Remote Admin; Use HTTPS
Default-on services are convenient but risky. UPnP (Universal Plug and Play) can silently punch holes in your firewall for gadgets and apps; attackers have abused UPnP vulnerabilities to expose devices to the internet. Turn UPnP off, and manually set port forwards only if absolutely necessary. Remote administration via HTTP from the internet should be off; if you must manage remotely, use HTTPS on a non-standard port and restrict by IP allowlist—or better, use a VPN (Step 11). Disable Telnet and FTP services; web admin over HTTPS is the minimum. Many vendors now ship with safer defaults, but it’s worth verifying.
How to do it
- UPnP: Off.
- Remote admin: Off (or HTTPS only, IP-restricted).
- Local admin: HTTPS only.
- Old protocols: Disable Telnet/FTP.
Numbers & guardrails
- Exposed ports allowed: ideally none. If unavoidable, 443/8443 with strong admin password and IP allowlist.
- Review port forwarding list: expect 0 entries on a typical home network. CISA
Synthesis: Fewer exposed services mean fewer ways in; if a feature auto-opens doors (like UPnP), close them and take the time to open only what you truly need.
7. Improve DNS Privacy and Filtering (DoH/DoT)
By default, many routers send DNS queries in clear text. You can upgrade privacy by using DNS over HTTPS (DoH) or DNS over TLS (DoT) if your router or DNS resolver supports it. Configure reputable resolvers that offer malware blocking and domain filtering, or run your own resolver if you’re comfortable with advanced setups. DoH/DoT encrypts the “phone book” lookups your devices make, reducing on-path snooping and tampering. As a bonus, DNS filtering can block known malicious domains, adding a protective layer for IoT gear that phones home.
Tools/Examples
- Public resolvers that support DoH/DoT (check provider docs).
- Router firmware that supports DoH/DoT or DNSSEC validation.
- Network-level filters (e.g., Pi-hole) combined with DoH/DoT upstream.
Numbers & guardrails
- Prefer DoH/DoT with reputable resolvers; keep a secondary resolver configured.
- Test with “DNS leak” tools after changes to confirm encryption.
Synthesis: Encrypting and filtering DNS makes it harder to watch or alter where your devices connect and helps block known-bad destinations by default.
8. Control Devices: Inventory, Onboarding Rules, and MAC Filtering Reality
Security improves when you know every device on your network. Make an inventory: phones, laptops, TVs, cameras, smart speakers, plugs, appliances. For each, note the owner, device type, and which SSID it should use. Many routers show a live device list and allow device naming, notes, and static DHCP leases so critical gear (like a NAS) always gets the same IP. MAC address filtering isn’t real security—addresses are easy to spoof—but it can be a lightweight speed bump for accidental connections or a convenience for allowing only known devices on an IoT SSID. If you operate a small business or advanced home lab, consider 802.1X (EAP-TLS) for stronger, certificate-based Wi-Fi access, but be aware it’s complex.
Mini checklist
- Keep a device roster; remove unknown or unused clients.
- Use static DHCP for servers/NAS/printers.
- Group devices by Main/Guest/IoT SSIDs.
- Periodically review connection history and remove stale entries.
Numbers & guardrails
- Review the device list monthly.
- Use names that include owner & type (e.g., “alex-iphone-main”).
- If you try MAC filtering, treat it as convenience only, not a defense.
Synthesis: An accurate inventory and clear onboarding rules reduce surprises and make troubleshooting and incident response faster when something weird shows up.
9. Monitor and Alert on Network Changes
Good security isn’t set-and-forget. Turn on notifications for new device joins, admin logins, firmware updates, and configuration changes. Many routers can email or app-notify you; some let you send logs to a syslog server for history. Lightweight tools can scan your network periodically and alert if a new MAC address appears or a known device goes offline. A quick glance at logs can reveal repeated failed login attempts or an unfamiliar device grabbing an IP on your main SSID. If your router supports per-SSID stats, check whether IoT devices are chattier than expected; unusual spikes can indicate compromise or misconfiguration.
How to do it
- Enable push/email alerts in the router app/UI.
- Configure syslog to a local collector if available.
- Run a weekly scan with a trusted discovery tool.
- Review failed login and new device events.
Mini case
You enable join alerts and see “New device: TV-Kitchen on Main.” You intended the TV to be on IoT only. You move it to the IoT SSID, block LAN access for that SSID, and the excessive traffic to ad servers drops noticeably the next day—exactly what you wanted.
Synthesis: Light monitoring turns mystery issues into quick fixes and gives you early warning if something isn’t right.
10. Tune Radio Settings to Reduce Leakage and Interference
Security and privacy benefit from radio tuning. Use 20 MHz channel width on 2.4 GHz to reduce interference and improve reliability for IoT; use 40/80 MHz on 5 GHz (and 80/160/320 MHz on 6 GHz if available) for performance. Choose non-overlapping channels and avoid crowded ones. Consider reducing transmit power just enough to cover your space; less power means less signal spilling into hallways or the street. If you have a mesh system, place nodes to minimize overlap and set band steering so capable devices prefer 5/6 GHz. These tweaks won’t replace encryption, but they help limit who can hear your Wi-Fi beacons and improve stability so devices aren’t tempted to reconnect insecurely.
Numbers & guardrails
- 2.4 GHz: 20 MHz, channels 1/6/11.
- 5 GHz: 40–80 MHz based on density; avoid DFS channels if radar events cause drops.
- 6 GHz: 80–160–320 MHz depending on gear; keep power conservative.
- Transmit power: aim for adequate coverage, not max blast; adjust gradually and test.
Mini checklist
- Survey your environment with a Wi-Fi analyzer app.
- Re-position routers/mesh nodes; keep them central, off the floor, away from metal.
- Reboot radios after large changes to ensure clients re-associate cleanly.
Synthesis: Tuning channels and power improves reliability and subtly reduces exposure, making the rest of your defenses work better.
11. Use a VPN for Remote Access; Avoid Exposed Ports
If you need to reach your home network while away, don’t open the router’s admin interface to the internet. Instead, set up a VPN such as WireGuard or OpenVPN on supported routers or a small always-on device. A VPN creates an encrypted tunnel so you can securely access your LAN without leaving ports visible. If a camera, NAS, or game server demands port forwarding, limit it to the smallest set and consider alternatives like vendor relays (with strong accounts) or VPN-based access. Remember to pair VPN use with strong keys and a long admin password.
How to do it
- Prefer WireGuard (simple, fast) where available; otherwise OpenVPN.
- Use a random high UDP port, long keys, and restrict by source IP if possible.
- Disable remote admin on WAN; manage through the VPN.
- Keep client configs in your password manager.
Numbers & guardrails
- WireGuard keys: 256-bit.
- Admin exposure: target 0 open admin ports to the internet.
- Periodic review: test VPN monthly and after firmware changes.
Synthesis: A VPN gives you secure reach-back without advertising an admin panel to the world—much safer than port-forwarding your router UI.
12. Keep a Simple Maintenance Rhythm and Mind Device Lifecycle
Security sticks when you make it routine. Keep a one-page runbook listing your SSIDs, passwords, and special settings (stored securely). After any meaningful change, export a configuration backup. Schedule a quick quarterly review to scan device lists, confirm updates, and re-test remote access. Consider physical security too: place the router centrally and away from windows; ensure no one has easy access to WPS or reset buttons. When retiring devices, factory-reset them and wipe any storage before donation or recycling; change Wi-Fi passwords if a device had admin access. Finally, assume change: as new standards and features arrive, revisit steps in this tutorial and upgrade deliberately. CISA
Mini checklist
- Config backup after changes.
- Quarterly: review SSIDs, devices, updates, VPN.
- Retire safely: reset and wipe; update passwords if needed.
- Keep a short cheat sheet for family members.
Synthesis: A light cadence—backup, review, retire—keeps your Wi-Fi secure without turning you into a full-time network admin.
Conclusion
Securing your Wi-Fi isn’t about hunting obscure settings; it’s about getting a few fundamentals consistently right. You turned on strong encryption, chose long passwords, and killed risky shortcuts like WPS and UPnP. You segmented guest and IoT devices, tightened DNS privacy, and stopped exposing admin pages to the internet. You added just enough monitoring to notice when something changes, tuned your radios for reliability and privacy, and set a simple rhythm for updates and backups. Those steps dramatically cut the odds of unauthorized access, snooping, and malware moving laterally across your home. Make a note to revisit the essentials every few months, and you’ll keep pace as devices come and go. Ready to finish? Take five minutes now to enable WPA3 and disable WPS—you’ll feel the difference immediately.
FAQs
1) Is hiding my SSID a good security measure?
Not really. Hiding the SSID tends to create connection hassles and does not protect against a determined attacker, who can still see management frames and infer the network. Real protection comes from WPA3/WPA2-AES with strong passphrases, network segmentation, and good hygiene. Keep the SSID visible, set PMF if available, and focus effort where it matters.
2) My smart plugs only work on 2.4 GHz. What should I do?
Use a dedicated IoT SSID on 2.4 GHz and keep your main phones and laptops on 5/6 GHz. Enable client isolation for the IoT SSID and consider DNS filtering for that segment. This keeps slow, chatty devices from interfering with your main SSID and limits their reach if one is compromised.
3) Do I need WPA3 right now, or is WPA2-AES enough?
If your router and devices support WPA3, enable it—it brings a stronger handshake and better protections against offline guessing. If you must, WPA2-AES remains acceptable for compatibility, but avoid TKIP or mixed modes. Plan to migrate fully to WPA3 as you replace older devices.
4) Should I disable UPnP?
Yes for most homes. UPnP makes it easy for apps to open inbound ports automatically, but attackers and malware have abused it repeatedly. Turn UPnP off and manually add a port forward only if you truly need it, understanding the risk.
5) Is MAC address filtering worth using?
Treat it as a convenience feature, not a security control. MAC addresses can be spoofed in seconds. Filtering can reduce accidental joins or help you keep an IoT SSID tidy, but it won’t stop an attacker who is already nearby and motivated. Rely on encryption and segmentation instead.
6) Do I need a VPN at home?
You don’t need a VPN for everyday browsing on your own Wi-Fi if you’ve applied this guide. But for remote access to your files or admin pages, a site-to-site or device VPN (WireGuard/OpenVPN) is the safest approach; it eliminates exposed admin ports on the internet.
7) Which DNS should I use—DoH or DoT?
Both encrypt DNS between you and a resolver. DoH rides over HTTPS; DoT uses TLS on a dedicated port. Pick whichever your router and chosen resolver support reliably. Combine encryption with a reputable resolver and optional filtering for best results. IETF Datatracker
8) Should I hide my router in a cupboard for safety?
Avoid tucking it into metal cabinets or behind dense obstacles. You want a central, open location for better coverage and fewer retries, which indirectly boosts security by reducing the temptation to weaken settings to “just make it work.” Keep it off floors and away from windows to reduce signal spill.
9) How long should my Wi-Fi passphrase be?
Aim for 16–24 characters or a 4–6 word passphrase. Length is the largest factor in resilience. A strong passphrase plus WPA3’s SAE handshake makes offline cracking impractical for home attackers. Use a password manager to store and share it safely.
10) Do guest networks slow everything down?
Not if you configure them well. Apply modest rate limits on the guest SSID and keep isolation on. Guests won’t compete with your main devices for local resources, and you’ll prevent them from accessing sensitive gear like a NAS or printer. ncsc.gov.uk
11) Is disabling WPS really necessary?
Yes. The PIN method is vulnerable to brute-force attacks; vendors explicitly recommend disabling it. Push-button WPS also increases the attack surface. With QR codes and password managers, there’s little reason to keep WPS enabled today.
12) What’s one change I can make right now for the biggest gain?
Enable WPA3 (or WPA2-AES if that’s your only option), disable WPS, and change the admin password to a long, unique value. Those three moves close several common gaps at once and set a secure baseline for everything else.
References
- Guidelines for Securing Wireless Local Area Networks (WLANs) — NIST — Publication date: not stated — NIST Publications
- A Guide to Securing Networks for Wi-Fi (IEEE 802.11 Family) — CISA — Publication date: not stated — CISA
- Securing Wireless Networks — CISA — Publication date: not stated — CISA
- WPA3 Encryption and Configuration Guide — Cisco Meraki — Publication date: not stated — Cisco Meraki Documentation
- NCSC Device Security Guidance Collection — NCSC (UK) — Publication date: not stated — ncsc.gov.uk
- CERT/CC Reports Vulnerability in Universal Plug and Play Protocol — CISA — Publication date: not stated — CISA
- How Do I Create a Good Password? — NIST — Publication date: not stated — NIST
- RFC 8484: DNS Queries over HTTPS (DoH) — RFC Editor / IETF — Publication date: not stated — RFC Editor
- RFC 7858: Specification for DNS over TLS (DoT) — RFC Editor / IETF — Publication date: not stated — RFC Editor
- NETGEAR: WPS PIN Brute-Force — Recommendation to Disable — NETGEAR Knowledge Base — Publication date: not stated — kb.netgear.com