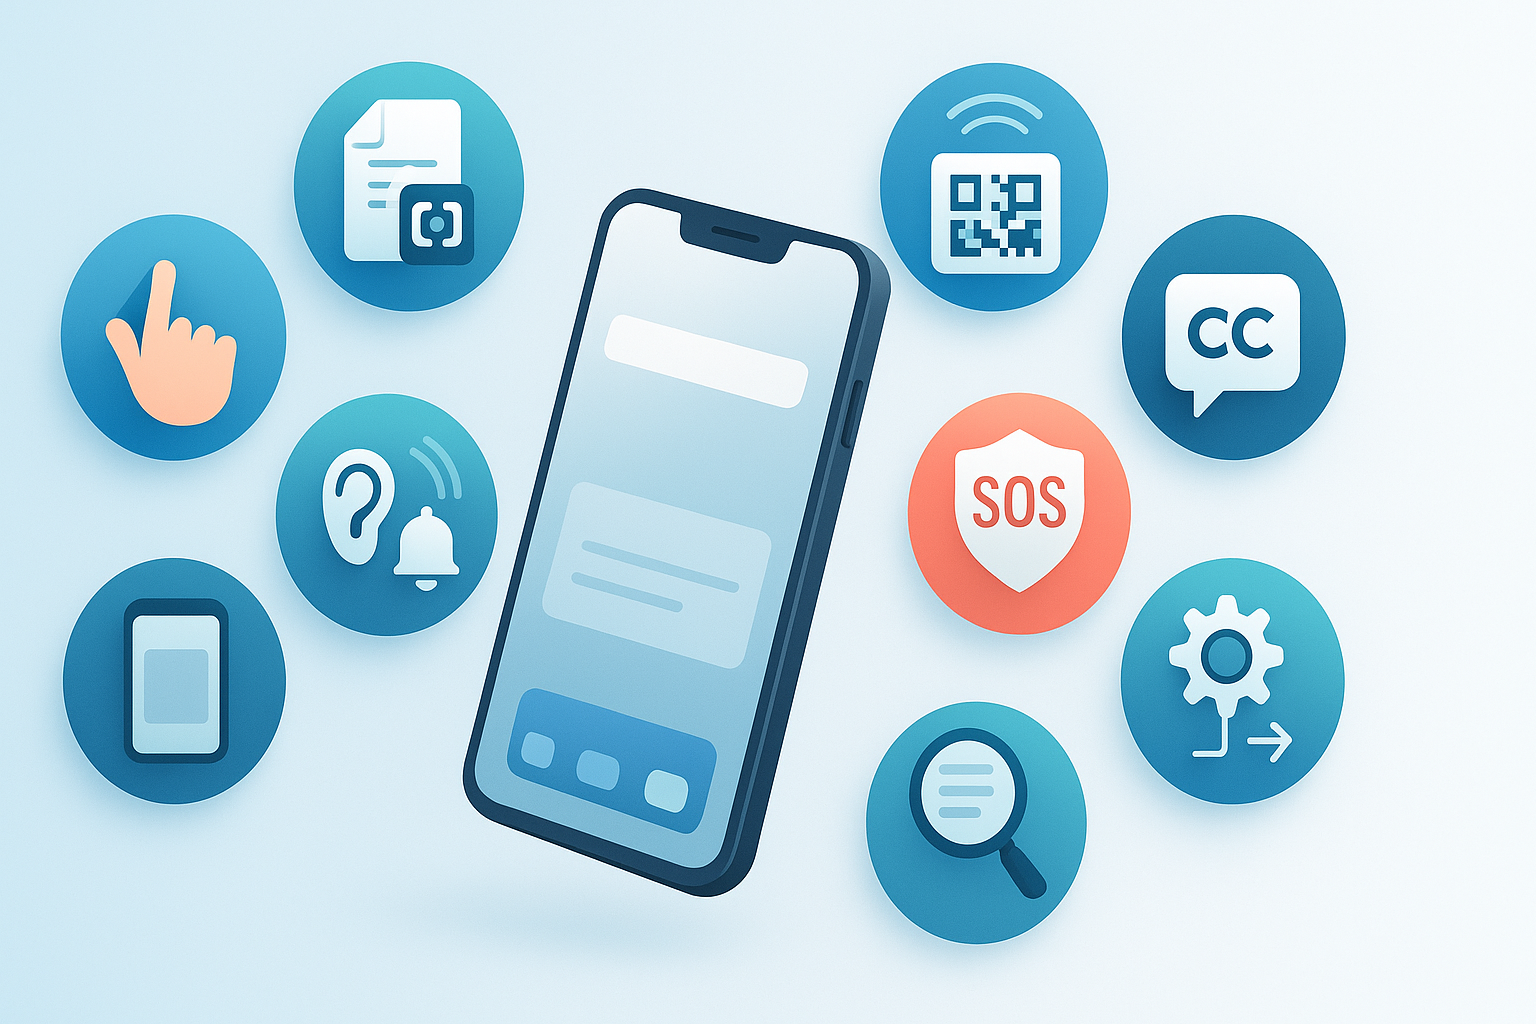
Most of us use the same handful of apps and gestures every day—swipe to unlock, open messages, snap a photo, doomscroll, repeat. Yet modern phones hide a surprising number of time-saving, accessibility-boosting, even safety-critical tricks just below the surface. In this guide to hidden smartphone features, you’ll uncover ten powerful tools that can help you work faster, stay safer, and make everyday tasks easier—whether you use iPhone or Android.
What you’ll learn: how to turn the back of your phone into a programmable button, scan documents without a scanner, caption any audio instantly, translate text directly from your camera, share Wi-Fi in seconds, get alerted to important sounds around you, and more. This article is written for everyday users who want practical, step-by-step instructions with beginner-friendly tweaks and smart safety notes.
Key takeaways
- Your phone has pro-grade tools built in. You can scan documents, copy text from photos, translate instantly, and measure accessibility features without extra apps.
- Accessibility equals convenience. Features designed for accessibility—like Sound Recognition, Magnifier, Live Captions, and One-handed mode—help everyone.
- You can automate your phone. Personal automations and routines perform repetitive tasks for you, triggered by time, location, or apps.
- Safety is a swipe away. Emergency SOS and related tools can share your location or contact services when it really matters.
- Measure what matters. Track usage (times used, minutes saved) to see which features earn a permanent spot in your daily flow.
Quick-start checklist (2 minutes)
- Update your phone to the latest software.
- Open Settings → Accessibility and skim the list—you’ll enable several features from here.
- Add key toggles to Control Center (iPhone) or Quick Settings (Android): Live Captions, Magnifier/Magnification, Sound Recognition/Sound Notifications.
- Confirm you can find your Wi-Fi password or QR code to share.
- Add emergency contacts and enable Emergency SOS features.
1) Turn the back of your phone into a shortcut button (Back Tap / Quick Tap)
What it is & why it’s great
Double- or triple-tapping the back of your phone can trigger useful actions—take a screenshot, open the camera, toggle the flashlight, show notifications, or run a custom shortcut. It’s a fast, eyes-off way to reach frequent actions.
Requirements & low-cost alternatives
- Works on many modern iPhones (Back Tap) and Pixel phones (Quick Tap).
- If your model doesn’t support back-tap gestures, use on-screen gestures (e.g., a quick settings tile or shortcut widget) to reach the same actions.
How to set it up (step by step)
- iPhone: Settings → Accessibility → Touch → Back Tap → choose Double Tap and/or Triple Tap, then select the action (e.g., Screenshot, Torch, Shortcuts).
- Pixel: Settings → System → Gestures → Quick Tap → toggle on → choose an action (Screenshot, open app, play/pause, etc.).
Beginner tweaks & progressions
- Start with one simple action (e.g., Screenshot). Later, assign a Shortcut/Routine that toggles multiple things at once (e.g., turn on Do Not Disturb + start a playlist).
- If taps misfire, experiment with double vs. triple tap, or pick a less-sensitive action (show notifications).
Recommended frequency/metrics
- Use it daily for 1–2 actions.
- Track “taps saved” by counting how many times you trigger the shortcut vs. opening the app manually.
Safety & common mistakes
- Avoid assigning destructive actions (like emergency calling) to Back/Quick Tap.
- If you use a thick case, you may need to tap more firmly or adjust expectations.
Mini-plan (example)
- Map Double Tap → Flashlight.
- Map Triple Tap → Screenshot for quick captures.
2) Ditch the scanner—use your phone’s built-in document scan
What it is & why it’s great
Your phone can scan multi-page documents into crisp PDFs, straighten edges, remove shadows, and auto-detect pages. Perfect for receipts, forms, homework, or ID copies.
Requirements & low-cost alternatives
- On iPhone, the Notes app includes a native Scan Documents tool.
- On Android, the Google Drive app can scan to PDF (and often ships pre-installed).
- If you want editing extras (stamps, OCR to text), your built-in tool plus a cloud editor often suffices.
How to do it (step by step)
- iPhone (Notes): Notes → New note → Camera → Scan Documents → align page → capture → adjust corners → Save to create a PDF in Notes.
- Android (Drive): Drive → Camera → capture → adjust crop → Save (choose folder and filename).
Beginner tweaks & progressions
- Create a dedicated “Scans” folder or note to keep everything tidy.
- Turn on auto-capture when scanning stacks of receipts.
- Progress to naming conventions like YYYY-MM-DD_vendor_amount.pdf.
Recommended frequency/metrics
- Use on-demand; aim to scan within 24 hours of receiving a paper you need later.
- Metric: minutes saved vs. walking to a scanner; lost-receipt incidents reduced to zero.
Safety & common mistakes
- Avoid scanning sensitive docs on shared/public devices; use device passcodes and backups.
- Don’t forget to crop—crooked edges make text recognition less accurate if you OCR later.
Mini-plan (example)
- Scan a receipt; rename 2025-08-13_groceries.pdf.
- Upload to your finance folder.
3) Copy, translate, or call text straight from your camera (Live Text / Lens)
What it is & why it’s great
Your camera can “see” text on menus, signs, business cards, and invoices—then copy, call phone numbers, translate phrases, or open links. It’s instant OCR for real life.
Requirements & low-cost alternatives
- On iPhone, use Live Text in the Camera or Photos.
- On Android (and iPhone too), Lens in Google app/Photos can copy/translate text.
- Offline translation may require language packs; otherwise, it uses data.
How to use it (step by step)
- iPhone: Open Camera → point at text → tap the textual highlight or detection button → Copy, Translate, Call, or Look Up.
- Android: Open the Google app or Photos → tap Lens → point at or open an image → tap Text → select → Copy, Translate, or Search.
Beginner tweaks & progressions
- Start with copying a phone number from a poster.
- Progress to scanning Wi-Fi passwords on printed labels or translating entire menus abroad.
Recommended frequency/metrics
- Weekly use is typical; track time saved vs. retyping, and error rate (misreads vs. corrects).
Safety & common mistakes
- Always check captured text—proof errors before sending.
- Avoid capturing sensitive credentials where bystanders or cameras can see your screen.
Mini-plan (example)
- Capture a parcel tracking number with the camera, copy it, and paste into your courier app.
- Translate a sign during travel and save it to notes.
4) Make big screens easy with One-handed mode (Reachability / One-handed)
What it is & why it’s great
Phones got taller; thumbs did not. One-handed options temporarily lower the UI so your thumb can reach the top rows and buttons—great for quick replies or map searches while your other hand is busy.
Requirements & low-cost alternatives
- iPhone offers Reachability.
- Many Android phones include One-handed mode (Android 12+ on many models).
- If unavailable, use custom launchers or enable larger icons/layouts for reach.
How to enable (step by step)
- iPhone: Settings → Accessibility → Touch → Reachability (on). Then swipe down on the bottom edge to pull the screen lower.
- Android: Settings → Accessibility → One-handed mode → turn on. Use the gesture or button to shrink/shift the screen.
Beginner tweaks & progressions
- Start by using it to reach the top search bar, then expand to quick settings toggles.
- Pair with a smaller keyboard height for better thumb comfort.
Recommended frequency/metrics
- Use as needed; count fewer grip changes per task (you’ll feel the difference).
- Metric: taps without repositioning your hand.
Safety & common mistakes
- Don’t rely on one-handed use while walking in traffic or on stairs; stop first.
- If nothing happens, confirm your gesture style and that the feature is enabled.
Mini-plan (example)
- Turn on One-handed mode.
- Practice opening search in your browser using a single thumb.
5) See spoken audio as text—everywhere (Live Captions)
What it is & why it’s great
Live Captions transform speech into on-screen text across apps—videos, podcasts, phone/video calls, and voice messages. It’s a huge help in noisy places, for accessibility, or when you can’t play audio aloud.
Requirements & low-cost alternatives
- Available on many Android phones (often a volume-panel toggle).
- Available on recent iPhones in Accessibility settings.
- If your model doesn’t support it, try captions in the specific app (e.g., YouTube subtitles).
How to enable (step by step)
- Android: Press volume → tap the Live Caption icon (or Settings → Accessibility → Live Caption). You can customize profanity filtering and sound labels.
- iPhone: Settings → Accessibility → Live Captions → toggle on. Optionally customize appearance and enable in specific apps like FaceTime.
Beginner tweaks & progressions
- Start with captions on podcasts or short videos.
- Progress to using captions during calls or in-person conversations (microphone mode) when needed.
Recommended frequency/metrics
- Use on demand; metric: percentage of media you watch with captions on vs. off.
Safety & common mistakes
- Captions may not be perfect; verify names, numbers, and addresses before acting.
- Using the mic for live conversation captions consumes more battery—bring a charger for long sessions.
Mini-plan (example)
- Turn on Live Captions during your next subway ride to follow a tutorial.
- Customize caption size and style for comfortable reading.
6) Let your phone “listen” for doorbells, alarms, and more (Sound Recognition / Sound Notifications)
What it is & why it’s great
Your phone can alert you to important sounds—doorbells, smoke alarms, sirens, a baby crying, running water—by displaying notifications, vibrating, or flashing. It’s an accessibility feature that adds peace of mind for everyone.
Requirements & low-cost alternatives
- Works on most modern iPhones and many Android phones via built-in tools.
- If not present, specialized apps and wearables can provide similar alerts.
How to set it up (step by step)
- iPhone: Settings → Accessibility → Sound Recognition → turn on → Sounds → choose sounds to detect (e.g., Smoke Alarm, Doorbell, Cat/Dog). Add a Control Center toggle for quick access.
- Android: Settings → Accessibility → Sound Notifications → Open Sound Notifications → grant permissions → choose how to be notified (vibrate, flash, watch alerts).
Beginner tweaks & progressions
- Start with a single high-priority sound (e.g., Smoke Alarm).
- As you gain confidence, add personalized sounds (where supported) or combine with smart lights for visual alerts at night.
Recommended frequency/metrics
- Enable at home or in specific locations; track “false positives” vs. useful alerts to fine-tune your list.
Safety & common mistakes
- Do not rely on a phone alone for life-safety systems—keep working smoke/CO detectors.
- Place the phone where its microphones can “hear” (not buried under pillows).
Mini-plan (example)
- Enable detection for Smoke Alarm and Doorbell.
- Set notifications to vibrate + flash for nighttime.
7) Share Wi-Fi in seconds (QR & Guided share)
What it is & why it’s great
Forget spelling out your 24-character passphrase. Your phone can share Wi-Fi securely—either by generating a QR code others can scan or by sending the password directly to a nearby device.
Requirements & low-cost alternatives
- Most modern Android phones can generate a Wi-Fi QR code in Settings.
- Many iPhones can share Wi-Fi to nearby Apple devices or reveal the password for copying; for cross-platform guests, show a QR code generated by an app or shortcut.
How to do it (step by step)
- Android: Settings → Network & Internet (or Connections) → Wi-Fi → tap your network → Share → authenticate → show the QR code to a guest to scan.
- iPhone (to Apple devices): Ensure both devices have Wi-Fi/Bluetooth on and are in each other’s contacts → on the guest device, choose the network → on your phone, tap Share Password.
- iPhone (to any device): Settings → Passwords → Wi-Fi → view your network → copy password and share; or generate a QR code using a trusted tool.
Beginner tweaks & progressions
- Save a screenshot of your home network’s QR (Android) and print it for guests.
- On iPhone, add a note with the Wi-Fi password in a shared family note for quick access.
Recommended frequency/metrics
- As needed for guests; metric: time saved vs. manual typing and connection errors avoided.
Safety & common mistakes
- Only share with people you trust. Change the router password if it’s been widely shared.
- Keep your QR printout in a private place, not visible from the street or windows.
Mini-plan (example)
- Generate a QR for your home Wi-Fi (Android) or prep a “guest” note with password (iPhone).
- Test by scanning with a second device.
8) A lifeline on your lock screen: Emergency SOS
What it is & why it’s great
Emergency features can call or text emergency services, share your location with trusted contacts, and—on supported models—even connect via satellite when there’s no cellular or Wi-Fi coverage. Some devices also include fall or crash detection.
Requirements & low-cost alternatives
- Check your phone’s Safety/Emergency settings; availability varies by model and region.
- If your device lacks advanced features, set up ICE (In-Case-of-Emergency) info in Contacts and keep local emergency numbers saved.
How to set it up (step by step)
- iPhone: Settings → Emergency SOS → configure call method and emergency contacts; on supported models, learn how to text emergency services via satellite when out of coverage. Add Medical ID in the Health app.
- Android: Settings → Safety & emergency (or Personal Safety) → set up Emergency SOS, emergency sharing, and contacts. Some phones can trigger SOS by pressing the power button multiple times.
Beginner tweaks & progressions
- Practice the SOS gesture briefly (without placing a call) so you know how it works.
- Add emergency contacts and enable location sharing during SOS.
Recommended frequency/metrics
- You’ll hopefully never need it; review settings twice a year.
- Metric: completion of emergency profile (contacts, medical info, test alert).
Safety & common mistakes
- Avoid accidental triggers—learn the exact button presses.
- Satellite messaging requires open sky; it’s slower than cellular texting and not available everywhere.
Mini-plan (example)
- Add two emergency contacts and complete your Medical ID.
- Learn the SOS gesture and where to access the satellite demo (if supported).
9) Turn your phone into a magnifying glass (Magnifier / Magnification)
What it is & why it’s great
Tiny serial number? Faded label? The Magnifier (iPhone) or Magnification (Android) tools enlarge text and objects, adjust contrast, apply filters, and toggle the flashlight. They’re invaluable for reading fine print in low light.
Requirements & low-cost alternatives
- Magnifier app on iPhone; Magnification in Accessibility on Android.
- If you want persistent large text on screen content, increase system Display size or Font size in settings.
How to use it (step by step)
- iPhone: Open Magnifier (search if you don’t see it) → zoom slider → optional filters, brightness/contrast, torch. Add Magnifier to Control Center for fast access.
- Android: Settings → Accessibility → Magnification → enable the shortcut → when needed, tap the shortcut and pinch/drag to zoom. Some versions offer a floating window magnifier.
Beginner tweaks & progressions
- Add the Magnifier toggle to quick settings (or Control Center) for one-tap access.
- Customize color filters for better readability on receipts or invoices.
Recommended frequency/metrics
- Use as needed; metric: time to read small text without strain, reduced misreads.
Safety & common mistakes
- Prolonged camera use + torch drains battery—close Magnifier when done.
- Don’t rely on Magnifier alone for safety-critical tasks like identifying medications; double-check labels.
Mini-plan (example)
- Add Magnifier to your quick toggles.
- Use it to read a product’s tiny warranty code and save a snapshot to notes.
10) Make your phone work for you: Personal automations & routines
What it is & why it’s great
Automations run sequences of actions based on triggers like time of day, location, opening an app, connecting to headphones, or tapping an NFC tag. They can silence your phone at work, send a “leaving now” text, or auto-enable Low Power Mode.
Requirements & low-cost alternatives
- On iPhone, use the Shortcuts app to create Personal Automations.
- On Android, use Routines/Automations via the Google app or Home app (naming varies by device), or set up quick actions in third-party tools if needed.
How to build one (step by step)
- iPhone: Shortcuts → Automation → New Personal Automation → choose a trigger (Time of Day, Arrive, App, Battery Level, etc.) → add actions (Set Focus, Set Low Power Mode, Send Message, Play Playlist) → turn off Ask Before Running for automatic execution where permitted.
- Android: Open Assistant or Home app → Routines/Automations → pick a starter (time, voice, sunrise/sunset, device state) → add actions (adjust volume, broadcast, lights, thermostat, send text where supported) → save.
Beginner tweaks & progressions
- Start with a Bedtime routine: lower volume, turn on Do Not Disturb, set an alarm, and enable dark mode.
- Progress to context-aware automations: When I open Maps → turn on Bluetooth + increase brightness; When battery < 35% → enable Low Power Mode.
Recommended frequency/metrics
- Aim for 2–3 core automations.
- Metric: minutes saved per day; interruptions reduced (e.g., fewer missed alarms, fewer manual toggles).
Safety & common mistakes
- Review automations after major OS updates.
- Be careful with always-on triggers (e.g., every app launch) that can spam notifications.
Mini-plan (example)
- Create When I arrive at work → turn on Work Focus/Do Not Disturb.
- Create At 10:30 PM → enable Bedtime routine, including an alarm and muted notifications.
Troubleshooting & common pitfalls
- Back/Quick Tap isn’t responding: Remove thick or rigid cases, try triple-tap instead of double-tap, and pick a simpler action to test.
- Document scans look skewed: Re-capture with better lighting; use the auto-capture edge guide; flatten pages with a book or clip.
- Live Text/Lens won’t detect text: Hold steady for a second; ensure the text is sharp and high-contrast; try snapping a photo and using the feature in Photos instead of live view.
- One-handed mode doesn’t engage: Verify the feature is enabled, then confirm you’re using the correct gesture/button for your device.
- Live Captions lag or vanish: Check battery saver settings, disable app battery optimizations for the caption service, and ensure volume/mute states don’t hide the panel.
- Sound Recognition/Notifications miss alerts: Move the phone closer to the sound source; add multiple alert types; ensure permissions (microphone, notifications) are granted.
- Wi-Fi sharing QR won’t scan: Increase screen brightness, avoid glare, and confirm the guest scans from the device’s Wi-Fi screen if required.
- Emergency SOS false alarms: Learn the exact button sequence; consider enabling the “require swipe to call” option where available.
How to measure your results (simple KPIs)
- Time saved per task: Estimate seconds saved by shortcut vs. manual navigation (screenshot, flashlight, quick settings).
- Error rate: Wrong numbers or typos avoided when using camera text capture or scans.
- Interruptions reduced: Fewer notification distractions (count mutes/quiet times).
- Reliability: Number of successful alerts from Sound Recognition/Notifications during a week.
- Automation wins: Count how many actions your automations perform daily (e.g., volume set, modes toggled) without you touching the phone.
A simple 4-week starter roadmap
Week 1: Core convenience
- Enable Back/Quick Tap for two actions (Flashlight, Screenshot).
- Set up One-handed mode.
- Scan three real-world papers and file them.
Week 2: See & hear smarter
- Turn on Live Captions and customize style.
- Use Live Text/Lens three times (copy a phone number, translate a menu, capture a serial).
- Add Magnifier to your quick toggles and use it twice.
Week 3: Safer everyday
- Configure Emergency SOS and add two emergency contacts.
- Enable Sound Recognition/Notifications for at least two sounds (e.g., Smoke Alarm, Doorbell).
- Practice the SOS gesture briefly.
Week 4: Automate the boring stuff
- Build a Bedtime routine (mute, dim, alarm).
- Build one workday routine (on arrival: enable Focus/Do Not Disturb).
- Set up fast Wi-Fi sharing (QR for Android or share flow/password access for iPhone) and test with a family member.
Track wins in a note: “taps saved,” “minutes saved,” and “emergencies configured.”
FAQs
1) Will these features drain my battery?
Most are passive until you activate them. Live Captions, Sound Recognition/Notifications, and Magnifier use more power while active; close or toggle them off when not needed.
2) Do I need special apps?
No—everything listed here uses built-in tools. Optional third-party apps may add polish, but you can start with what’s already on your phone.
3) My phone doesn’t show a feature mentioned here. Why?
Availability varies by model, region, and software version. Update your system first, then search your Settings app for the feature name.
4) Are Live Captions private?
On many devices, captions are generated on-device. Still, treat sensitive information with care and review your phone’s privacy settings.
5) Can I use Wi-Fi QR codes with iPhone guests?
Yes—most iPhones can scan QR codes with the Camera app. Alternatively, iPhones can share Wi-Fi to nearby Apple devices without revealing the password.
6) Do Back/Quick Tap gestures work with thick cases?
They can, but performance varies. Try tapping near the top center, switching to triple-tap, or assigning a less time-sensitive action.
7) Will Sound Recognition replace smoke detectors?
No. It’s a helpful extra alert but not a substitute for dedicated safety devices.
8) How accurate is camera text capture?
It’s very good in clear lighting with sharp text, but always proof critical details (names, digits, addresses).
9) Can automations run without asking me each time?
Yes, depending on the trigger and platform. Look for “Ask Before Running” (iPhone) or run-automatically options and confirm where allowed.
10) Is satellite emergency texting available everywhere?
No. Coverage depends on your region and device model. Check your phone’s emergency settings for availability and try any built-in demo to learn the flow.
11) What if Live Captions don’t appear during a call?
Confirm the feature is enabled for calls in its settings, and verify app permissions. Some calling apps may have their own caption toggles.
12) Can I customize which sounds Android detects?
Yes—open Sound Notifications settings to pick alert types, how you’re notified, and whether alerts appear on connected wearables.
Conclusion
Your smartphone is far more capable than most people realize. In a few minutes, you can turn the back of your phone into a shortcut button, scan paperwork like a pro, read or translate any printed text, share Wi-Fi in a blink, get alerted to critical sounds, caption any audio, and automate your daily routines. Start with two or three features, track your wins, then expand—your future self (and your thumbs) will thank you.
Try this now: enable one shortcut gesture (Back/Quick Tap) and set up Emergency SOS—two minutes that you’ll be grateful for all year.
References
- Use Back Tap on your iPhone, Apple Support, 2025, https://support.apple.com/en-us/111772
- Tap the back of iPhone to perform actions or shortcuts, Apple Support (User Guide), 2025, https://support.apple.com/guide/iphone/back-tap-iphaa57e7885/ios
- Use gestures on your Pixel phone (Quick Tap), Google Help, 2025, https://support.google.com/pixelphone/answer/7443425
- How to scan documents on your iPhone or iPad, Apple Support, 2025, https://support.apple.com/en-in/108963
- Scan text and documents in Notes using the iPhone camera, Apple Support (User Guide), 2025, https://support.apple.com/en-in/guide/iphone/iph653f28965/ios
- Scan documents with Google Drive (Android), Google Help, 2025, https://support.google.com/drive/answer/3145835
- Scan files as PDFs with your mobile device (Android), Google Workspace Help, 2025, https://support.google.com/a/users/answer/9308884
- Use Live Text with your iPhone camera, Apple Support (User Guide), 2025, https://support.apple.com/guide/iphone/use-live-text-iphcf0b71b0e/ios
- Google Lens — Copy and translate text, Google, 2025, https://lens.google/
- Reach the top of the iPhone screen with one hand (Reachability), Apple Support (User Guide), 2025, https://support.apple.com/guide/iphone/use-reachability-iph145eba8e9/ios
- Use one-handed mode (Android Accessibility Help), Google Help, 2025, https://support.google.com/accessibility/android/answer/12652418
- Live Caption: Caption media & calls on your device (Android), Google Accessibility Help, 2025, https://support.google.com/accessibility/android/answer/9350862
- Get live captions of spoken audio on iPhone, Apple Support (User Guide), 2025, https://support.apple.com/guide/iphone/get-live-captions-of-spoken-audio-iphe0990f7bb/ios
- Recognize sounds using iPhone (Sound Recognition), Apple Support (User Guide), 2025, https://support.apple.com/guide/iphone/use-sound-recognition-iphf2dc33312/ios


1 Comment